
If you are one of them who are getting Error 19 Windows PC code problem on your Windows PC again and again, then today you are at the right website because we are here working to solve and fix the users’ problems by any methods.
This shows an error code message like,
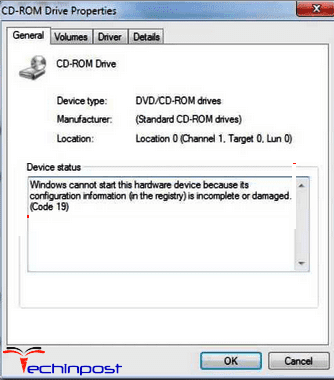
Windows cannot start this hardware device because its configuration information (in the registry) is incomplete or damaged.
Error 19
It seems like this error is caused by the third-party applications that were incorrectly installed. This error is a FASP management error code problem that refers to authentication failure. This error problem also occurs when the downloads are stopped, but the browser fails to inform the speed test of any program at all. From this Error Code 19, the optical drive stopped working. This error is one of the several device manager error code problems. This error problem includes the system PC freezes, crashes & possible virus infection.
Causes of Error 19 Windows PC Code Issue:
- Temporary error 19 yahoo
- Upper and lower filters error
- Yahoo mail error issue
- Physical connection is not usable
- Pioneer USB
- Windows 10 PC error
- Windows cannot start this hardware device code
So, here are some top best solutions and the guide methods for fixing and solving this type of Error 19 Windows PC code problem from you altogether.
How to Fix Error 19 Windows PC Code Problem Issue
1. Delete the Upperfilters and Lowerfilters registry values on your PC –
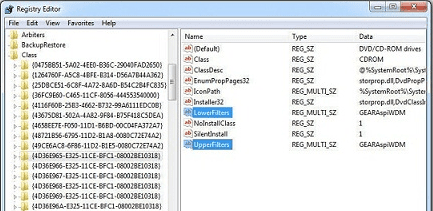
- Click Yes, then confirm the removal of Upperfilters registry entry
- If you see Lowerfilters on the right side
- Right-click Lowerfilters & click on Delete
- Click Yes to confirm the removal of Lowerfilters registry entry
- Exit Registry Editor
- Restart the Computer
- That’s it, Done
By Deleting the Upperfilters and Lowerfilters registry values, you can quickly fix your Error 19 Windows 10 problem.
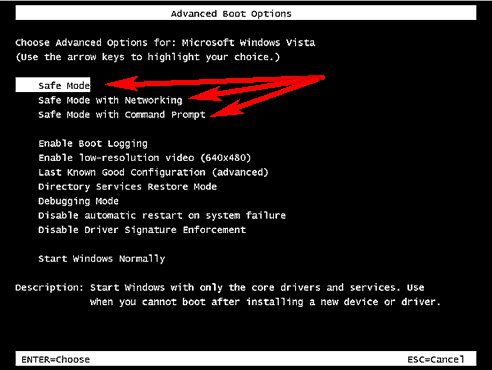
2. Boot your Windows PC in the Safe Mode –
- Go to the start menu
- Click on the Shutdown drop-down menu &
- Select the Restart option there
- Now, remove the battery & reinsert it in
- Afterward, restart your PC again
- Just after the restarting,
- Select the “Safe Mode” option there
- Now wait for some minutes to reset it
- That’s it, done
Running Windows in safe mode can eliminate this Error 19 Windows 8 problem.
3. Run a full Registry Cleaner of your Windows PC –
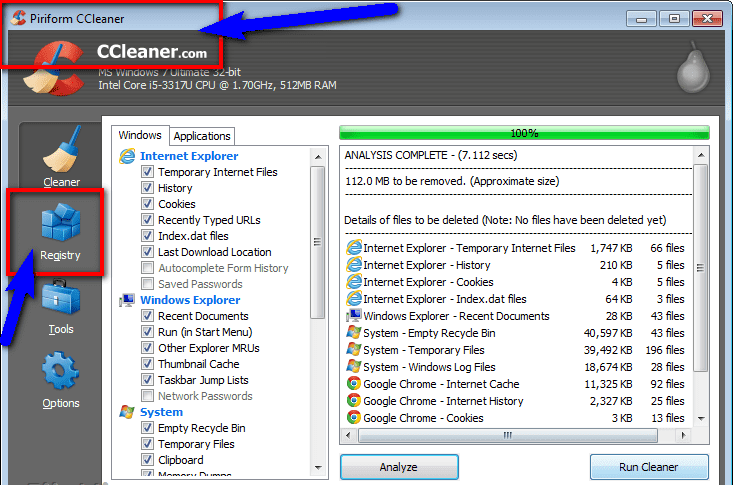
- First, Download and install the Ccleaner
- After downloading and installing the process
- Now, opens it
- Click on the ‘Registry‘ option there
- Click on their “Scan for issues” there
- After Scanning, Select the ‘Fix Selected Issues‘ option there to Fix it
- Now, restart your PC again
- That’s it, done
Wrong information stored in registry keys & accidentally deleting some registry keys can cause this error problem. Scanning and running the registry cleaner can also solve this Error Code 19 Windows 10 problem to stop it from appearing randomly.
Fixing by Cleaning the Registry from Ccleaner it can fix this Error code 19 Windows 8 problem from your PC.
4. Update your Windows Drivers on your Windows PC –

- Go to the start menu
- Search or go to the Control Panel
- Scroll down & go to the ‘Windows Update‘ options
- Check for any newly available drivers. Are there any
- If any are available, then update it fast
- Or, you can set them as ‘Install updates automatically.’
- For that,
Go to the left side ‘Change settings‘ options - Click on it & opens it
- Click on the drop-down menu there & select the ‘Install updates automatically option.
- Now, Click on the OK button there to save it
- That’s it, done
So these tips, it will help you in this Windows Error 19 matter on your Windows PC.
” OR “
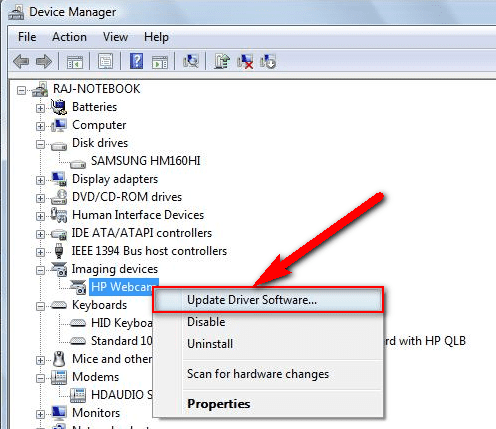
- Go to the start menu
- Search or go to the ‘Device Manager.’
- Click on the driver who has an error sign there
- Right-click on it &
- Click on the ‘Update Driver Software‘ option there
- Now, wait for some time for updating
- That’s it, done
By trying these, any two methods can also quickly fix this Error 19 Windows Code problem.
5. Create a System Restore Point on your Windows PC –

- Go to the start menu
- Search or go to the ‘System Restore.’
- Clicks on it and open it there
- After that, tick on the “Recommended settings” or ‘Select a restore point‘ there.
- After selecting, click on the Next option there
- Now, follow the wizard
- After completing, close the tab
- That’s it, done
So this guide & helpful tips, will solve this Error Code 19 DVD Drive issue from your PC.
“ OR “

- Go to the start menu
- Search or go to the ‘System Properties.’
- Click on it and opens it.
- After that, go to the “System Protection” option there
- Now, click on the “System Restore” option there
- & Create a Restore point there
- After completing, close the tab
- That’s it, done
Running a system restore and creating a new restore point by any of these two methods can completely solve this Error code 19 Windows 10 keyboard problem from your PC.
6. Run Antivirus for Virus or Malware Errors on your Windows PC –
- Go to the start menu.
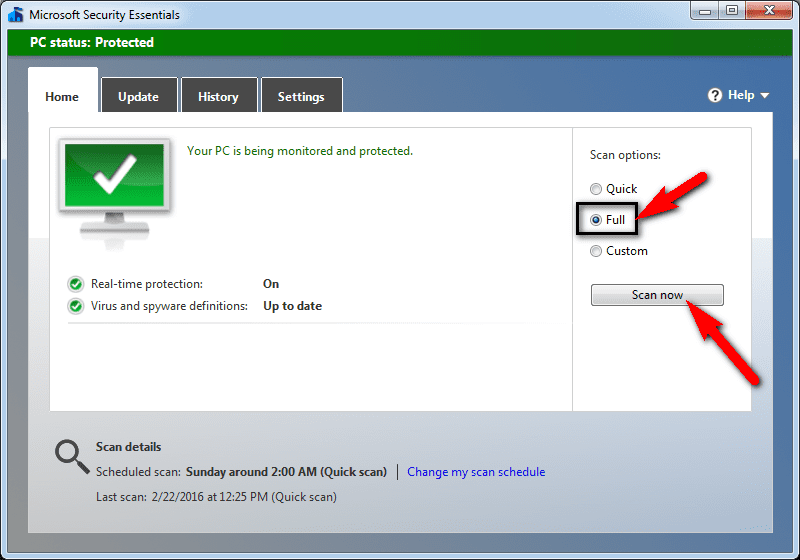
- Search or go to the ‘Microsoft Security Essentials.’
- Click on it and opens it.
- Tick the ‘Full‘ option to run a full scan of your PC
- Now, click on the “Scan Now” option there to scan your PC
- Now, wait for some minutes to scan it
- After completing, close the tab
- That’s it, done
By scanning your PC for malware/viruses, Microsoft Security Essentials can easily fix and solve this Error 19 Windows code problem.
7. Restart your Windows PC (Computer) once –

- Swipe in from the right of the screen
- Click on Settings
- Click on the Power there
- Click on the Restart option
- That’s it, Done.
By Restarting your computer again will quickly fix and solve your Error 19 Windows Code problem.
8. Troubleshoot & Run an Automatic Windows Repair on your PC –
- Go to the start menu
- Search or go to the PC settings there
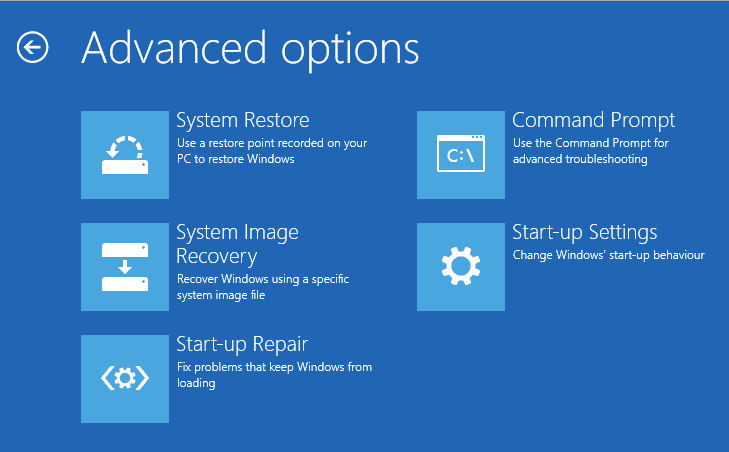
- Click on the ‘Troubleshoot‘ option there
- After opening, click on the ‘Advanced options‘ there
- Then, click on the “Automatic Repair” option there
- After troubleshooting, close the tab
- That’s it, done
Running an automatic repair of your PC can eliminate this Windows Error 19 code problem from your PC.
9. Remove or Reconfigure the newly Installed Devices on your PC –
By Removing or reconfiguring the newly installed device will fix your Error 19 Windows Code problem.
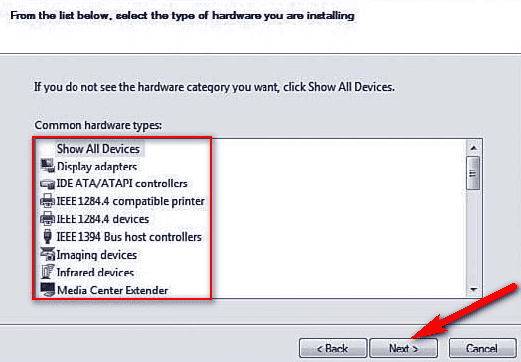
10. Reinstall the Drivers for the Devices on your Windows PC –

Reinstalling the drivers for the device will fix your Error Code 19 Windows 10 USB problem.
Conclusion:
These are some of the top best ways and solutions to get back from this Error 19 Windows PC code issue from your Windows PC permanently. Hope these methods will help you fix this Error Code 19 problem.
If you are facing this Error 19 Windows PC code or any error problem, then comment down the problem so that we can fix it too with our top best tricky method solution guides.


