
Many of us often get stuck in a situation where we cannot access our mobile phones because of specific damage issues resulting in touch access failure or screen blackout, & in conclusion, we have to say goodbye to all our important messages. Because today we will be introducing you to a tool that will change the course of history forever & make things much easier for a person who has faced such a situation where he cannot access his smartphone anymore. So, let me introduce you to the one-of-a-kind tool which is invented by the renowned company Wondershare called Dr.Fone Toolkit.
World’s 1st Data Retrieval Software for Broken Android Devices
With the use of technology at its peak, the developers & various technology enthusiasts continuously integrated tech to solve real-world problems; developers at Wondershare developed this fantastic dr.fone toolkit. The services available for Android mobile phones by dr.fone are listed as follows:
- Data Recovery
- Data Extraction
- Sim Unlock
- Root
- Lock Screen Remover
- Data Eraser
- Data Backup & Restore
- Screen Recorder
Access Android Phones with Broken Screen
Do you remember those moments when your phone fell to kiss the ground suddenly? We all have been there, and it is heartbreaking sometimes. But not anymore, as we will introduce you to Dr.fone Toolkit, which is more than enough for backing up, restoring, unlocking, and doing many things with your Android device.
Introducing the Dr.Fone Toolkit:
As we discussed this tool before, the Dr.fone toolkit is a software package developed by the renowned company Wondershare. Dr.fone toolkit is a cutting-edge much-needed software product used by many people out there, affected by different needs for their Android mobile phones. Dr.fone Toolkit has an incredibly simple User Interface (UI) with marvelously explained step-by-step instructions, so nothing can possibly go wrong, and for a matter of fact, this is the point that makes it the first choice for users who are willing to recover data or use other related services which the Dr.fone toolkit provides.
Basic Requirements to Use this Tool:
- These are the basic requirements that your Windows device must fulfill to use this application.
- Should support Windows OS 10, 8.1, 8, 7, XP, or Vista (older versions will not support this tool)
- Should have a CPU of 1GHz and above (32 or 64 bits)
- It should have a RAM of 256 MB (minimum), but developers recommend 1024 MB
- Hard disk space of 200 MB (minimum)
How to Use Dr.Fone & Recover Data from Broken Android Devices
The process of recovering data is very straightforward and easy to follow; just read the steps correctly and pay attention to the selections, and you’re ready to go.
1. Install Dr.Fone on Windows –
To install this application, click here. Choose the version you want to install and then download and install it.
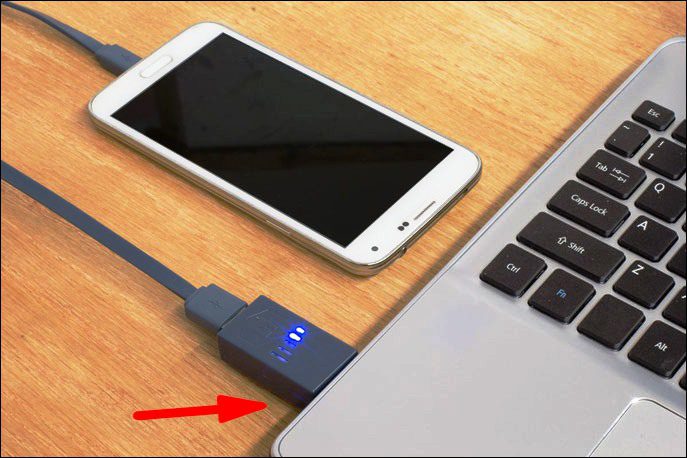
2. Connect your Broken Android Device –
Now, connect your broken Android device to your computer using a USB cable and see if it’s recognized.
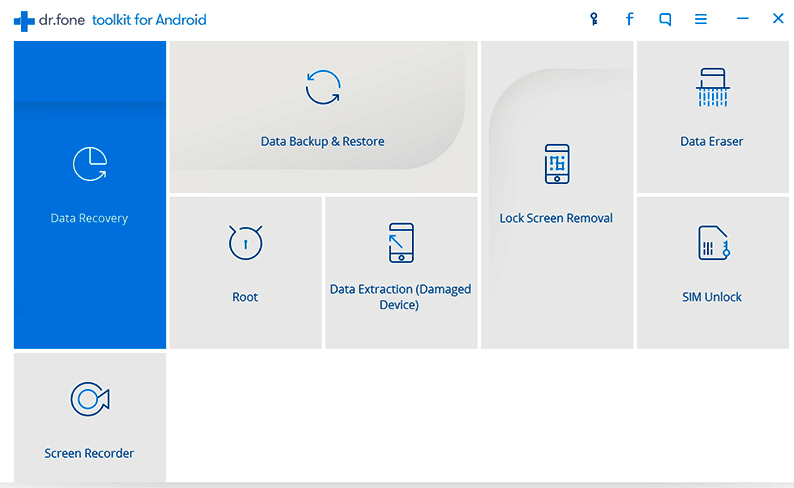
3. Launch Dr.Fone Toolkit –
After successful installation and connecting your device, just launch this application and see if your Android device is being recognized or not (in case it does not, comment below)
4. Select Data Extraction (Damaged Device) & Choose the File Type –
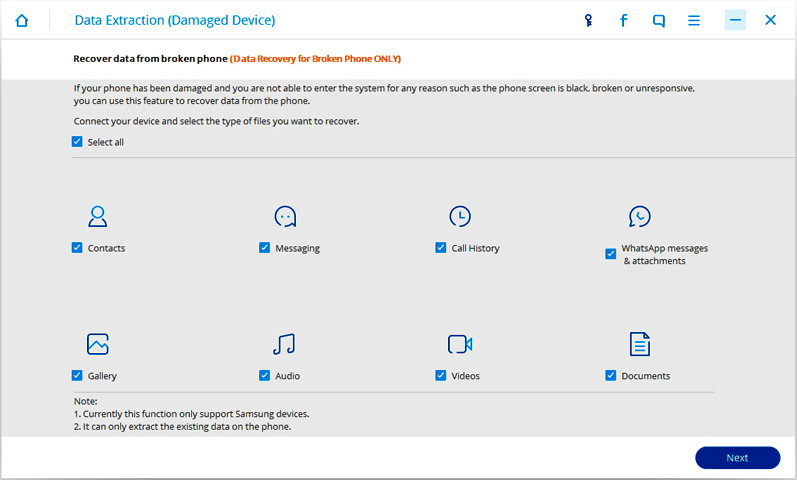
After that, choose the Data extraction from the damaged device option.
Although the application recovers all the android data by default. But, if you want a particular data to be recovered, you can choose that.
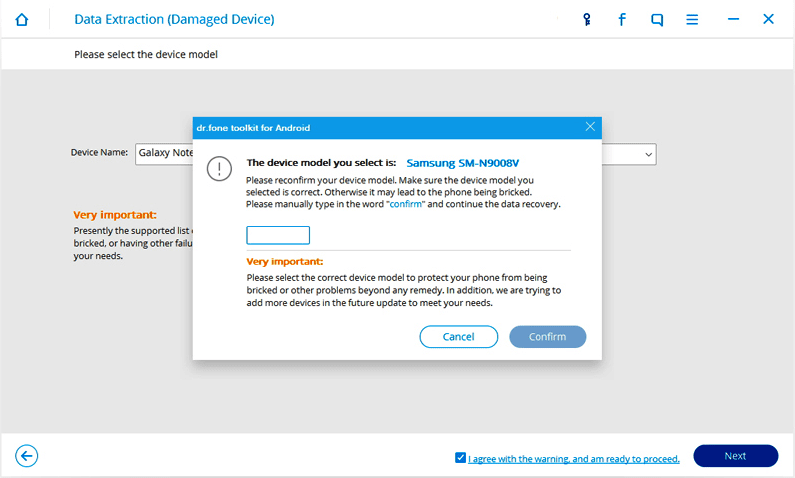
5. Select the Matching Fault Type & Device Name –
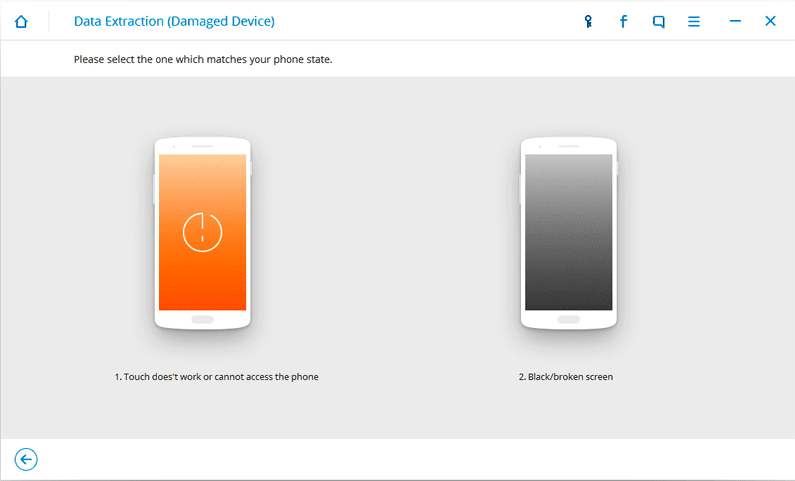
Well, there are two types of faults listed here. One is Black with a broken screen, and the other one cannot access the phone or Touch does not work. Click on the appropriate option and continue.
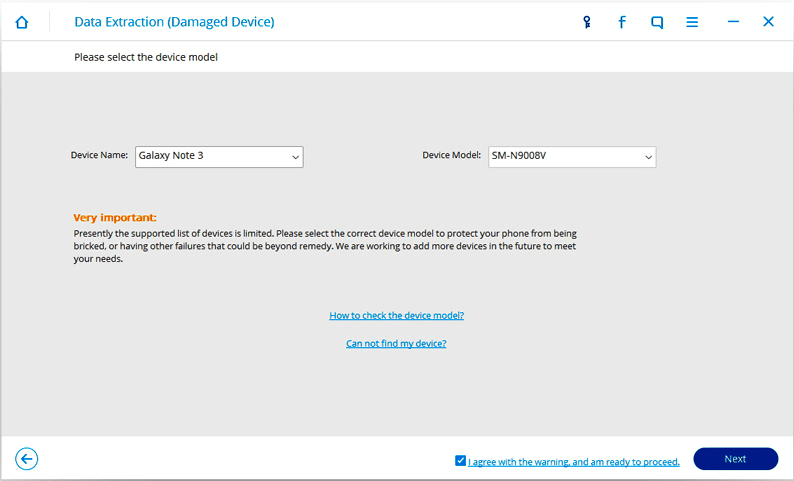
After this, select the correct model name of your device (currently available only to Samsung S, note, and tab series) and click on next.
6. Enter Download Mode on Android –
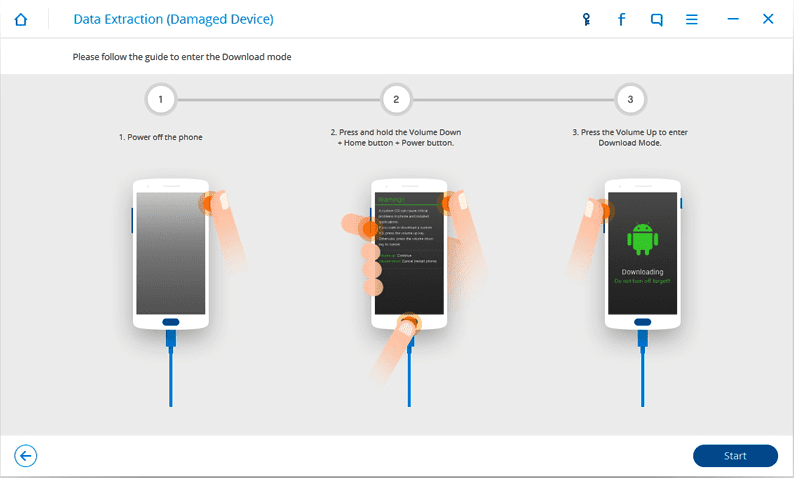
- Turn off your Android
- While it’s off, press and holds the volume down and the power button on your phone.
- Now press on the volume up button to access download mode.
7. Scan & Analyse Data –

After successfully entering the download mode, the dr.fone toolkit will automatically start analyzing and recovering broken files and download the recovery package.
8. Recover the Lost Data from Broken Android Device –
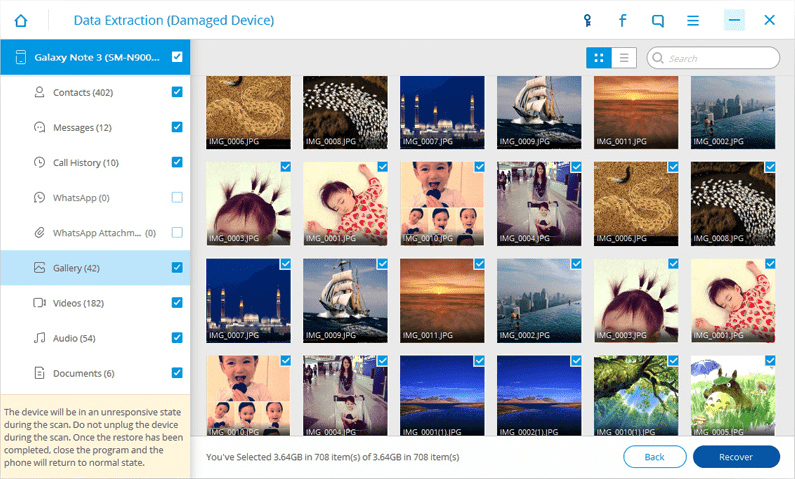
After following all these steps correctly, the dr.fone toolkit will automatically view and sort all the files into categories. You can also select and preview them if you want. Now all that’s left is choosing the files you want to recover, and after that, press ‘Recover’ to save all of your lost data on your PC. Easy isn’t it?


