
The Game DVR feature of Windows 10 can slow the gaming performance drastically due to the recording of the background video, Disable Xbox DVR Windows or Disable Game DVR is the best option that one can try for better and faster performance if you don’t want to record your gameplay.
This Disable Xbox DVR Windows 10 guides also lead to disabling the Game Bar, which generally pops up when one starts playing games. It is necessary if you want to take screenshots of the gameplay or record your gameplay.
What is the Game Bar & Game DVR?
In Windows 10, the Game DVR feature has initially been the part of the Xbox app, and it has been modeled with a similar feature as of Xbox One. The Game DVR can record video automatically of the gameplay in the background with the help of background recording, and save this video to any file when you choose. If you do not want to keep it, Game DVR will discard the video and continue with the recording in the background. This will allow you to play the game usually, and then you can choose to save only the last few minutes of the gameplay to a file if something amazing happens.
Unfortunately, the Game DVR uses the system resources. And thus, on a slower computer, if you want to have the maximum graphical experience for gaming, then it can significantly slow your gaming performance and also lower the FPS. If you do not want to record your gameplay, it is better to disable this feature. The Game DVR feature may be enabled or may not be enabled by default. This depends on your PC hardware.
The Game Bar is a graphical interface that will allow you to record the gameplay, take screenshots, and save clips with Game DVR feature. It doesn’t necessarily slow down the performance of your system, but it can sometimes get in your way by popping up in between your gameplay.
Even when you disable the Game DVR and the also Game Bar, the normal screenshot shortcuts and the game recording feature of NVIDIA, which was formerly known as the ShadowPlay, will still keep functioning.
Disable Game DVR:
In the Creators Update of Windows 10, the Game DVR and the Game Bar settings are moved into the main Settings. They are now no longer kept in the Xbox application as they were before.
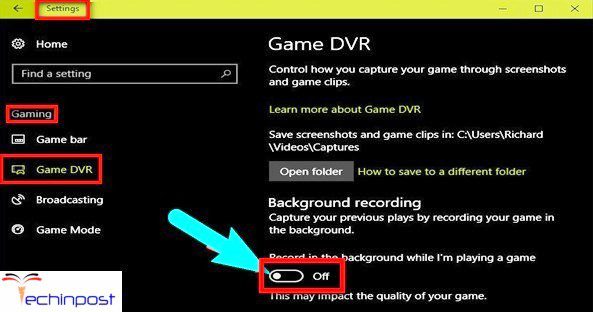
To disable Game DVR, go to Settings > Gaming > Game DVR and ensure that the Record in the background, while I’m playing a game option, is set to Off.
Windows 10 will not record anything automatically in the background, but you can still start the manual recording option from the Game Bar.
Disable Game Bar:
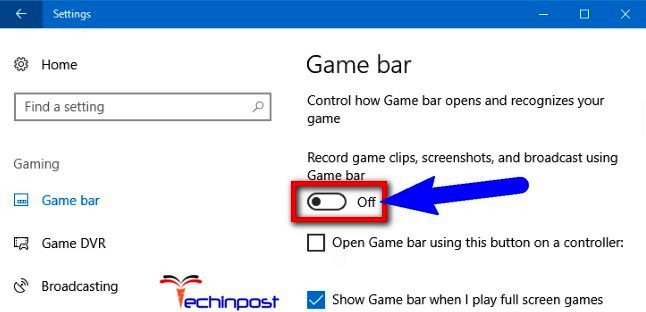
In order to disable Game Bar, Click on Settings –> Gaming –> Game Bar and then turn off the Record game clips, screenshots, and broadcast using Game bar option.
You won’t be able to find the Game bar after this. You will need to turn it ON again from here to reuse it.
An Alternate way to Disable Game DVR:
Move your mouse cursor to the Start Button and click it to expand the menu. Now from the expanded menu, you need to choose the All Apps entry, which is located at the end of the menu. Click on the All Apps and scroll it until you find Xbox entry. Once you find it, click the button, and if prompted, you should connect to the Internet.
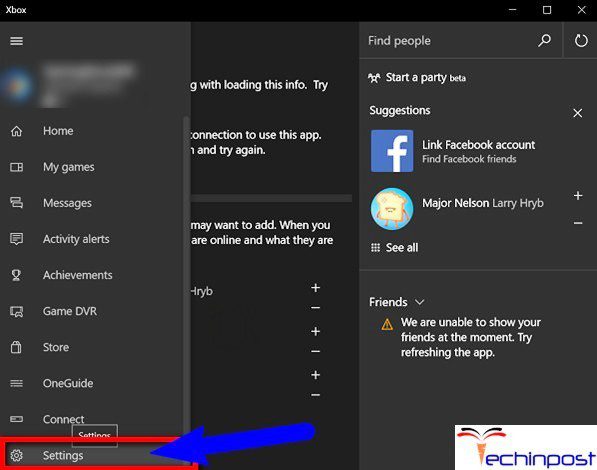
Now, when the Xbox screen appears to look for three horizontal lines towards the upper left corner of the Xbox, screen the hamburger menu and then click on it. Next, scroll down for locating the Settings option.
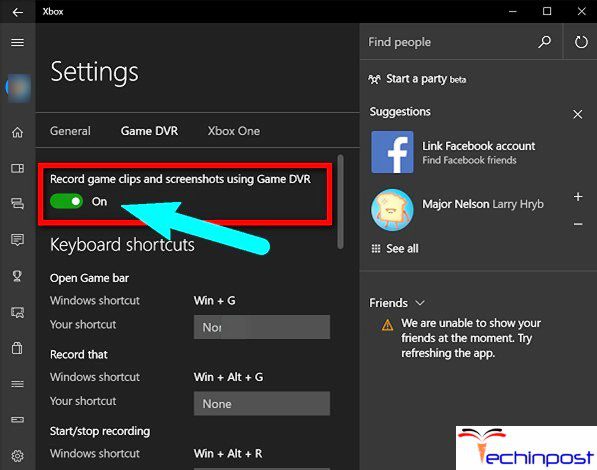
Click on the Settings. Below the Settings title, 3 separate options will be appearing. Choose the Game DVR.
A slider can be seen showing the ON position of the Record game clips and take screenshots using Game DVR. Slide it to Off position to disable the recording feature of the Game DVR.
So here are the solutions for How to Disable Xbox DVR Windows 10 O.S. PC. So just check the Disable Xbox DVR windows 10 tips and apply it on your PC.
(Guide) How to Disable Xbox DVR on Windows or Turn OFF through the Registry Editor
So just check that how to Disable Xbox DVR Windows 10 or Turn OFF it by Run regedit in order to start the Registry Editor and then you should navigate to the following registry key:
HKEY_CURRENT_USER\SOFTWARE\Microsoft\Windows\CurrentVersion\GameDVR
Right-click on the AppCaptureEnabled and set the value to 0. A value of 1 will enable it, whereas 0 will disable it.
Next, you should navigate to the following key:
HKEY_CURRENT_USER\System\GameConfigStore
Right-click on the GameDVR_Enabled and set the value to 0. A value of 1 will enable it, whereas 0 will disable it.
In Windows 10, the Game DVR feature is generally enabled by default so that one can easily store them locally to a PC or share their captured screenshots on any popular social media sites. Once you have disable Xbox DVR windows 10 features, none of the shortcuts will work.
So here are some easy steps and methods for you to get rid of How to Disable Xbox DVR Windows 10 O.S. PC Issue. I hope you will surely get back from how to Disable Xbox DVR Windows 10 PC issue.
If you are facing or getting any error issue while trying these Disable Xbox DVR Windows 10 guides, then comment down that Disable Xbox DVR Windows 10 OS PC problem here in the below comment section, or you can also directly mail us.


 “AI App of Unimaginable Terror: Best AI App for iPhone”")

