
“Oops! We couldn’t save that one.” is a Windows error that specifically belongs to the native Windows photo viewer app. With the latest and greatest Windows 10, all the default apps have been updated and evolved.
All the apps are now equipped with some additional and important features. Windows Photo Viewer is surely an important application that comes by default with the OS. It not only lets you view photos but also has some photo editing capabilities.
However, a lot of users after updating their Windows face a strange error called oops, we couldn’t save that one while using the photo viewer app. Whenever a user edits a file and then tries to save the changes, the error appears. This guide aims to fix the issue with various approaches.
Causes Of Oops We Couldn’t Save That One Error
“Oops! We Couldn’t Save That One” error can be caused due to a lot of reasons. While some users claim that the error occurs because of a Windows update, some claim that it is not an update issue. Users have reported that if the EXITF data of the image is compromised, the error appears. Furthermore, if the photo viewer is itself corrupted then also the error is triggered. Also, if the image file has already been edited with another photo editing, then also the error appears.
- ESITF data of the image is corrupted.
- Photo is already edited by another app.
- The photo viewer app is corrupted.
Similar Types of Oops We Couldn’t Save That One Error
- Oops we couldn’t save that one reddit.
- How to fix oops we couldn’t save that one
- Irfanview
- Windows photos cannot save.
- Online photo editor
- Windows store
- Couldn’t save the video the file is in use.
- Can t save pictures on windows 10?
- Windows 10 won’t let me save pictures.
- Windows 10 camera won’t save pictures.
Solutions To Fix “Oops! We Couldn’t Save That One Error”
“Oops! We Couldn’t Save That One” error is not a critical error and can be easily fixed by following the below solutions.
1. Use Save Copy Option
Since direct saving is causing the issue, some users have found an alternative way to save the image. Follow the steps.
- STEP 1. Once you have edited your photo
- STEP 2. Remain on the edit screen, on the bottom-right corner click on Save a copy.

- STEP 3. Using the save a copy have been found to be working for a lot of users.
2. Update Windows
The easiest way to resolve the issue is to update your windows if it is a major update then the issue will surely be resolved. Major updates replace all the system files with the new files, so the error chances reduced drastically. Follow the steps to update the windows.
- STEP 1. Open up the Run window, use the Windows + R key.
- STEP 2. In the empty field type Control Update
- STEP 3. Once you hit Enter a new window will pop up, now on the top click on the Check for updates button.

- STEP 4. If there are updates, make sure to install them, then restart your system and hopefully, the error will be resolved.
3. Using the Paint Program
If the error continues to occur, try changing the format to some other, major formats include JPG, JPEG, BMP, PNG. To easily change the format, you can use the windows native paint program. Follow the steps for a better understanding.
- STEP 1. Head to the Start menu, type Paint then hit enter.
- STEP 2. Once you are in the paint app, browse the image file that is having issues.
- STEP 3. Once the file is loaded, head to File > Save as > Choose the format, make sure not choose the current format.
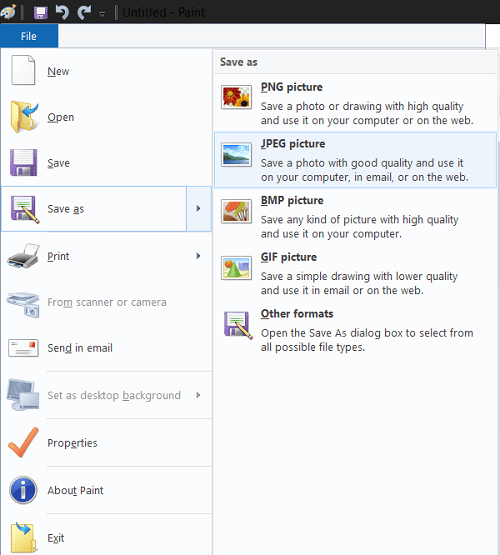
- STEP 4. Once the file is saved, head to the file, try editing, hopefully, you will not face the error.
4. Reset Photo Viewer Application
If the still persists then you have to reset the photo viewer application. Some users claim that resetting the application fixes the issue. Follow the steps to do so.
- STEP 1. Open up the Run window, in the empty field type ms-settings:appsfeatures then hit Enter.
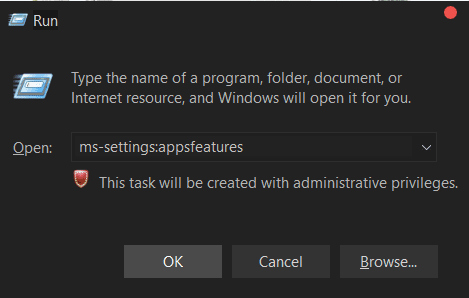
- STEP 2. A new window named App & features will open up.
- STEP 3. While you are in the Apps & features screen, scroll down to Microsoft Photos
- STEP 4. Now click on it to see the Advanced options button, then click on it.
- STEP 5. Again, a new window will pop up, scroll down and click on the Reset button.
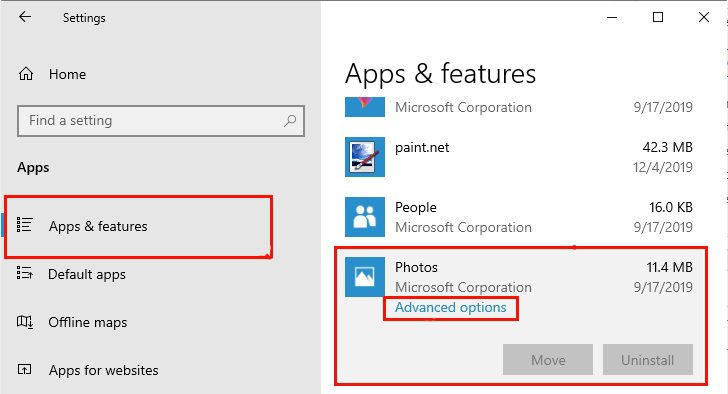
- STEP 6. Once the app is reset, now try editing the photos without error.
Conclusion
“Oops! We couldn’t save that one” is surely an annoying error as it doesn’t let you save your photos. But by following the above methods the problem can easily be fixed.
We hope your issue is fixed, for more guides, tips, and tech stuff follow us. Thank you!


")


Hey, cool post There is an issue with your website in Internet Explorer; could you please check this? Because of this issue, many people will overlook your excellent article because IE is still the most used browser.
I have read some excellent stuff here Definitely value bookmarking for revisiting I wonder how much effort you put to make the sort of excellent informative website
I have been surfing online more than 3 hours today, yet I never found any interesting article like yours. It is pretty worth enough for me. In my opinion, if all web owners and bloggers made good content as you did, the web will be much more useful than ever before.
I do agree with all the ideas you have introduced on your post They are very convincing and will definitely work Still the posts are very short for newbies May just you please prolong them a little from subsequent time Thank you for the post.